Posted on

Powerful Natural Remedies for Fleas in Dogs You Must Try!

Natural Remedies to Get Rid of Fleas on Dogs

We report cases of fleas on dogs all over the year, but the relation between summer and fleas is different as they both come at the same time. Maybe that’s why you have noticed that your dog is feeling itchy more than usual. Itchiness in dogs between the duration of June and October is primarily because of fleas. So, you did right to seek the natural solution to eliminate fleas on your dog because fleas can cause several diseases where allergy is the most common and least dangerous.

Natural Remedies to Get Rid of Fleas on Dogs

That’s why I’m here to assist you with some natural remedies (recommended by experts) to get rid of fleas. So, let’s get straight into it:

How to Naturally Get Rid of Fleas on Dogs: Step-by-Step!

[su_note note_color=”#72E8E1″ radius=”18″]

To naturally get rid of fleas on dogs, start by vacuuming and washing fabrics to eliminate infestations. Use apple cider vinegar, essential oils, and citrus baths to repel fleas from your dog’s coat. Strengthen immunity with brewer’s yeast and apple cider vinegar in food. Keep your lawn flea-free and prevent re-infestation with lemon spray and baking soda indoors.

[/su_note]

Before Natural Remedies….

Once Fleas have entered your house (through your pet), you must do some hard work even before applying natural remedies.
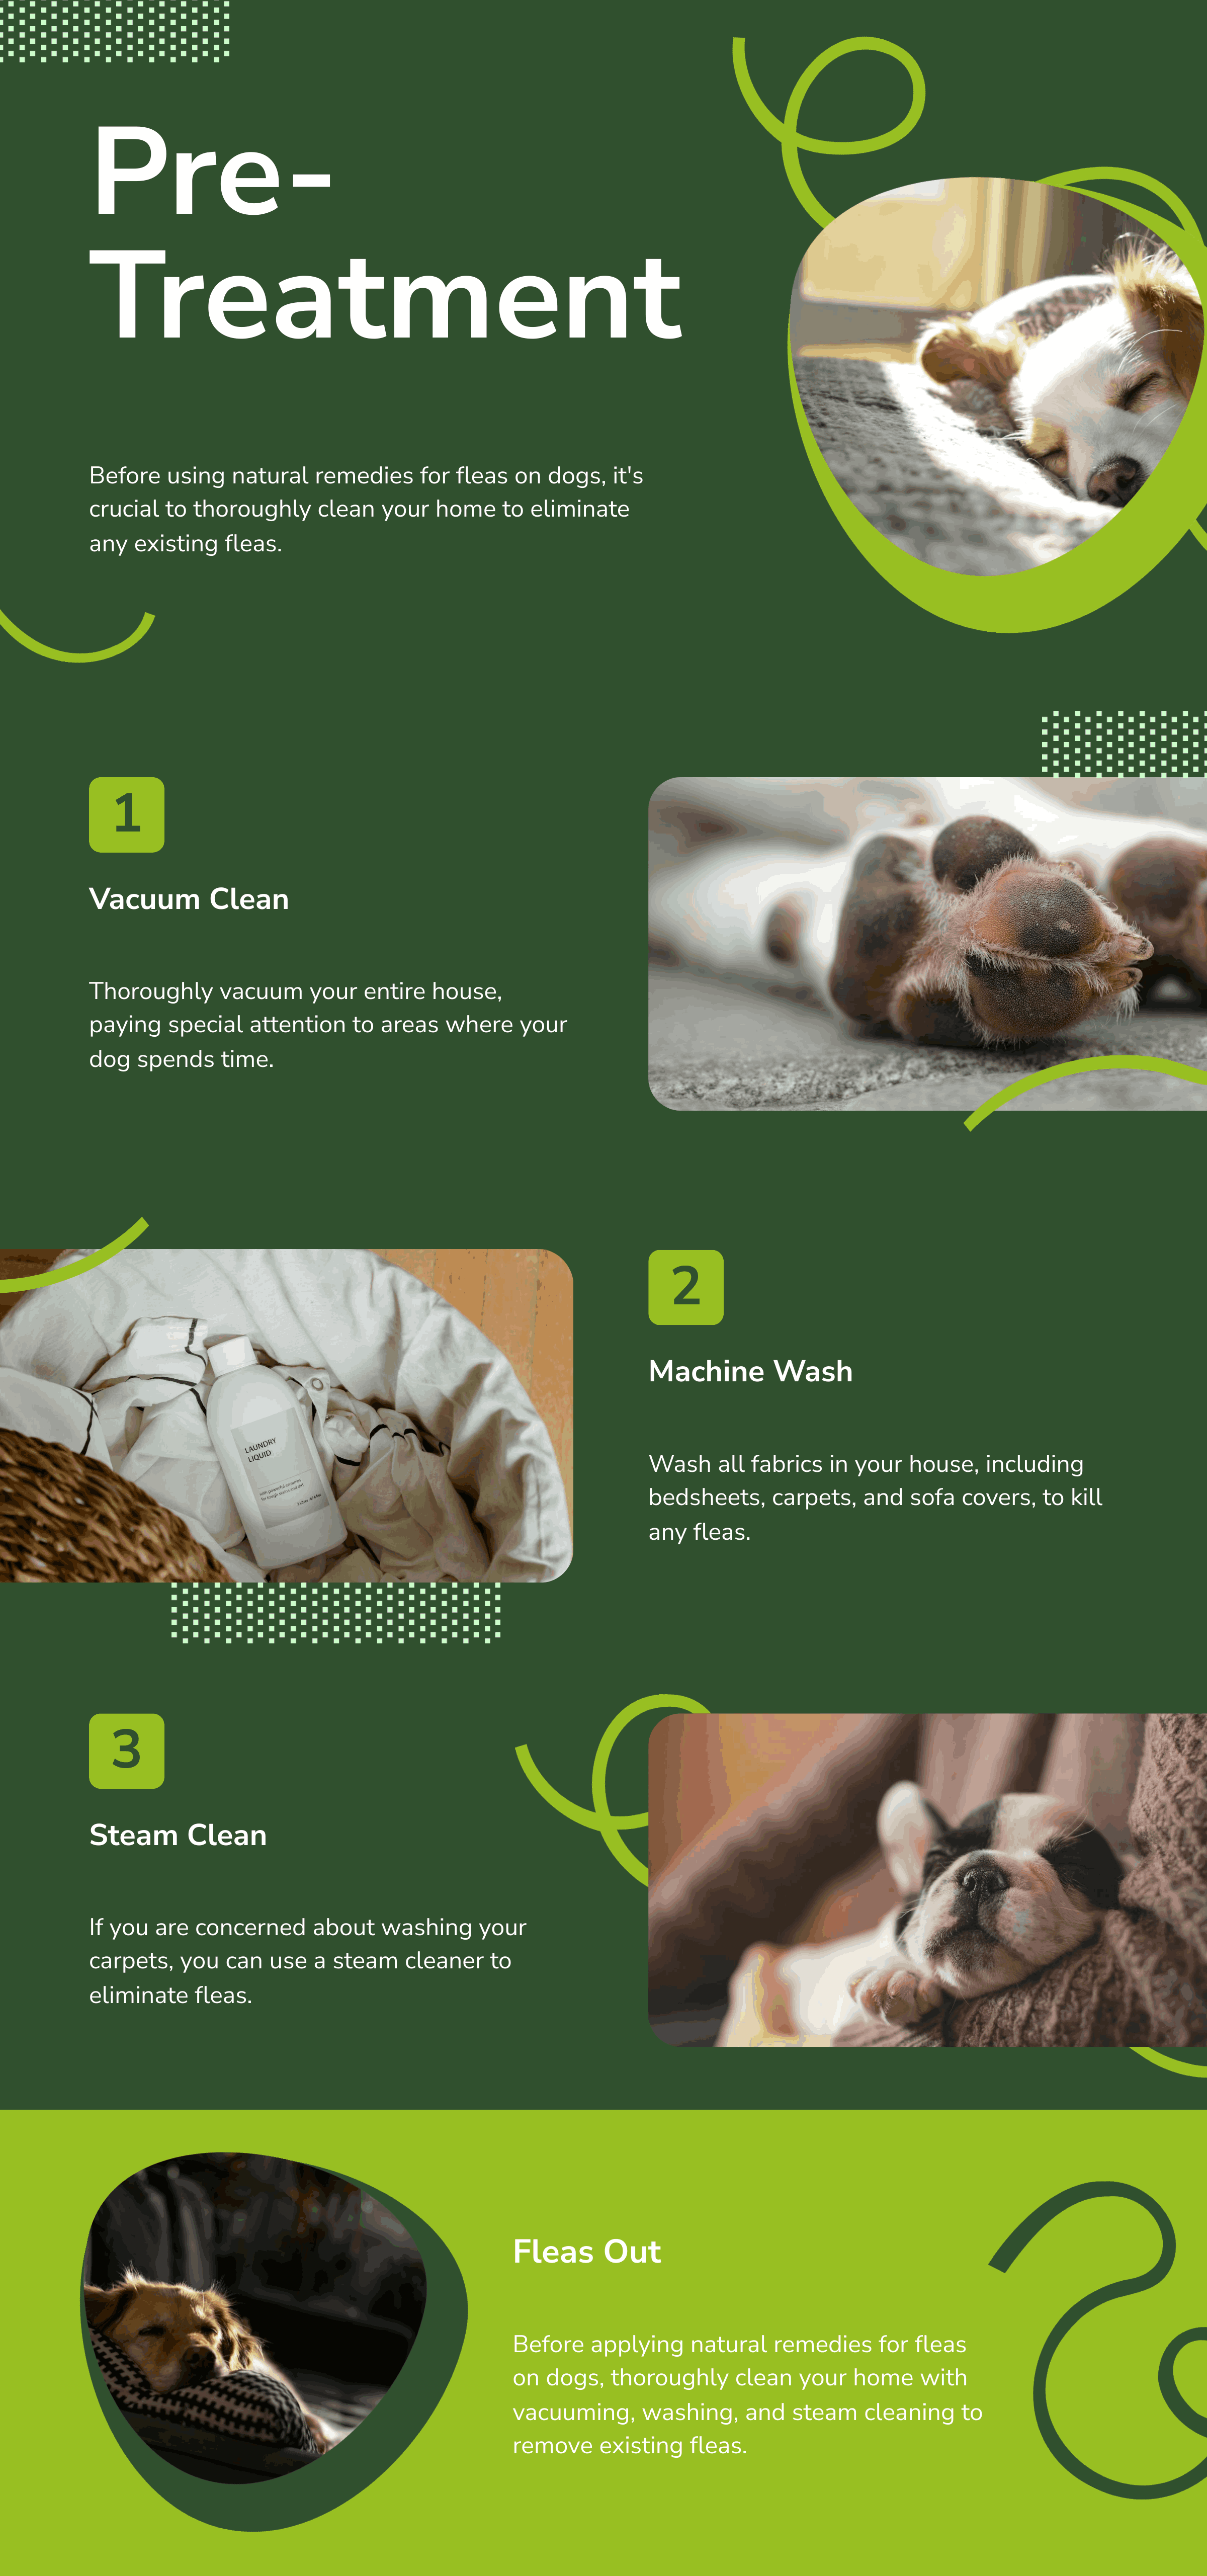
Before Natural Remedies

Vacuum Cleaning

Before anything else, you must vacuum clean your house thoroughly. Not even an inch should be spared in the home. Vacuum cleaning is effective, but if you do it with water, you can get the maximum benefit out of it. Because fleas will be drowned even before getting sucked by the machine.

Machine Washing

Machine wash every fabric in your home, from bedsheets to carpets and even sofa covers. In fact, you have to wash every cloth (including blankets, mats, beds, pillows, and towels) in your home where your dog possibly has spent time. It’s a big task, but you have to do it anyway because you don’t want any bit of fleas. Right?

Steam Cleaning

If you are concerned about machine washing your carpets and soft furnishings, you can go for steam cleaning. It will not just kill fleas but also will make your home cleaner and refreshed.

We recommend you repeat all these processes several times to ensure the infestation is no longer in your home.

  • Note: In case of no progress even after using all suitable remedies, you should rather opt for a proper pet bathing session.

Get Rid of Fleas on Your Dog By…

Now, it’s time to do some real work to clear out fleas from your doggy NATURALLY:

1. Nursing Your Dog (From Outside)

Before feeding your dog some remedies, you first have to ensure that there is no flea left on your pet’s body. Because if you go for feeding him and get successful, fleas can again jump in your pup’s body as dogs love licking their skin. Right?

So, here we go:

Apple Cider or Normal Vinegar

For this remedy, you must dilute vinegar or apple cider vinegar (because your dog loves both and fleas hate both). You will do it by adding a 1:1 ratio of both water and vinegar to a container. It is the best ratio you can use, but a few dogs don’t like the smell, so you can make it more dilute by going for a 1:3 ratio.

Now, put the mixture in a spray bottle to spray it on your dog’s body. Never spray it close to the eyes or any open wound. Repeat this task every day for a couple of days. If your dog doesn’t like spray, you can apply the mixture directly to his skin.

Essential Oils

Citronella, peppermint, eucalyptus, tea tree, and rosemary are those essential oils that you can use against fleas. Any available essential oils (diluted) should be used in a spray bottle with water for the best results (if your dog doesn’t mind spraying). Just add a few drops in approximately 400ml water to use on your dog.

But before that, you need to understand that essential oils like tea tree can be hazardous for your dog unless it is adequately thinned. The recommended percentage is 0.1% to 1%.

· Note: Dogs are pretty sensitive to scents of essential oils. So, you first have to bring a small amount of any (available) essential oil close to your pup’s nose to check whether you can use it on your dog or not. We can’t specify any particular oil as every puppy reacts differently in this case.

Citrus Bath

Opting for the citrus bath is maybe the cheapest and easiest way to kill fleas. But where to get citrus? You can simply get it from lemon (and other citrus fruits like orange). But experts always recommend lemon. So, add two cups of lemon juice and your dog’s favorite shampoo or soap to hot water. Boom! Your dog is not just flea-free but also fresh.

Heat

Like their brothers (Vampires), fleas also hate the heat, especially sunlight. So, spend more time (more than usual) with your dog outside in the sunlight to kill fleas naturally. You can also go for a heater, but we all know that sunlight has many other benefits as well.

2. Nursing Your Dog (From Inside)

Now is the ideal time to feed your dog some natural products to kill fleas your pups have swallowed while licking something.

Baker’s or Brewer’s Yeast

Baker’s or brewer’s yeast does not kill fleas directly; it is probably the most obscure way to eliminate and kill fleas from the inside. But we know that a healthy dog can never be a host of fleas. And the most effective, instant, and easiest way to increase your dog’s immunity is by feeding him baker’s or brewer’s yeast. Moreover, it’s not difficult to get it in a household, so add just one tablespoon of yeast to your dog’s regular meal.

Apple Cider Vinegar

We have already used this remedy for external use but will use it again. Because apple cider vinegar will not just help you get rid of fleas but also pacify the overly-alkalized digestive system of your pup. Actually, fleas hate (ACV), and dogs’ stomach loves it. So, let’s kill two birds with one stone (actually THREE!). You have to add ACV to your doggy’s food with water. Do it every day for a couple of days for the best results.

The recommended amount of ACV is no more than just one teaspoon for every 1.13 liters of water. But it is better to ask the vet so that he can recommend the amount according to the weight of your pup. You can slowly rise the amount of apple cider vinegar once your dog starts getting used to its smell and taste.

3. Making Lawn Flea-free

Your dog has gotten rid of fleas, but they still can get to your pup’s body through your lawn, as the lawn is usually the favorite place for insects (including fleas) to live. So, let’s make it fleas-free together:

No Shades

Heat and sunlight again come into play. As fleas hate sunlight, they mostly live under the shades. So, you better make your lawn as shade-less as you can. You should also eliminate damps as they can also find shade there.

Natural Killers

Some natural predators, like snakes, frogs, and lizards, eat fleas. But like me, you could also not like them. If so, you should go for “Nematodes.” You can get these multicellular animals from any plant’s nursery or store. They love killing flea larvae and pupae.

Flea-repelling Plants

Like some animals, there are quite a few plants that hate fleas. So, you must plant them on your lawn because you can’t make your lawn completely shadow-free. Right? Some plants that you can go for are:

  • Lavender
  • Thyme
  • Sage
  • Basil
  • Mint
  • Clove

4. Preventing Fleas From Entering Home

Now, after getting rid of fleas from your home, lawn, and, most importantly, your pup, you must also make your home unfriendly for fleas to avoid them entering your home. Because you don’t want to do all the hard work again. Right? To do that, we also have some natural and easy remedies that work every time:

Lemon and Water

You already know that lemon is super effective against fleas. So, why not use them in your home as well? This is the best advice I can give you if you ask us about preventing fleas in your house in the future. Now, take one or two slices of lemon and put them in water. Wait overnight, and then pour that water into a spray bottle. Spraying lemon water is the best way to do this remedy.

You should spray it every once in a while on the favorite spots of your doggy until you feel that fleas and completely vanished and will never come. The pleasant smell of this spray will also not irritate you and your pup. Another amazing thing about this remedy is that, unlike many natural remedies, this will never be allergic to any dog. So, now you can also spray it directly on the dog.

Brine

If you’re wondering, brine is a mixture of table salt and water. You can pour some brine on the hardwood floor at night. Till the morning, the brine will have done its work and will be dehydrated, so you will also need to be worried about vacuuming it.

Baking Soda

Baking soda is not one of the most effective things experts suggest using to (specifically) KILL fleas. Baking soda will kill larvae and eggs and absorb weird smells from your carpet or floor. You should use it simply like brine or salt.

We’ll never recommend you use brine and baking soda around your dog as they can be toxic. You can use them in the absence of your pup.

  • Tips: Never use 2nd or 3rd trick without the recommendation of your vet as the nature of every dog is different, and your doggy might be allergic to salt and baking soda.

Final Verdict

After reading the whole article, the best thing you know is that fleas hate the heat and strong smells. So now, when you will use these remedies, you will know the importance of all of them. Although these remedies are added based on expert advice, if your vet says otherwise, you should always listen to him. It is because he knows better about the nature of your dog, and we all know that every dog can have different allergies.

  • Note: Never use that spray bottle that has ever been used to store chemical cleaning products.

FAQs

Posted on

Pet Bathing & Grooming Secrets: A Must-Know for Pet Owners!

Pet Bathing and Grooming

An animal that spends most of its time roaming outside gets dirty, and smelly and may bring fleas, ticks, or infections into the home. A proper bath helps keep them clean and safe.

Some believe bathing daily is necessary, but that’s a misconception. The answer depends on many factors like coat type, lifestyle, and time of year. For example, a dog in rainy weather may need baths more often.

Grooming is an important aspect of pet well-being and includes wiping paws, brushing, nail trims, ear cleaning, blow-dry, haircuts, and anal gland expression. It also helps identify underlying diseases early.

Pet Bathing & Grooming Secrets: A Must-Know for Pet Owners!

Pet Bathing and Grooming – Here’s How to Make a Healthy, Happy Pet

[su_note note_color=”#72E8E1″ radius=”18″]

Pet bathing and grooming keep pets clean, healthy, and comfortable by preventing odors, infections, and shedding. Bathing removes dirt, while grooming includes brushing, trimming, and ear cleaning.

The frequency depends on breed, coat type, and lifestyle. Regular grooming strengthens bonds, improves hygiene, and ensures early health issue detection. Professional groomers offer specialized care for better results.

[/su_note]

What’s the Difference Between Pet Bathing and Grooming?

A bath keeps your pet fresh by cleaning its coat, ears, and nails, but grooming takes it further. Professional groomers provide extra services, like trimming and de-shedding to remove loose fur from the undercoat.


If your pet is suffering from matting or staining, a groomer has the ability to cut, trim, or even shave the affected areas for relief.

Some breeds of cats and dogs have standard styles that help identify them, and only skilled groomers can get it right. Special shampoos, soothing massage, and pleasant scents make the experience even better while reducing the shed and decreasing fur buildup at home.

What’s the Difference Between Pet Bathing and Grooming?

Importance of Pet Bathing and Grooming (7 Benefits)

Regular pet bathing and grooming are essential for maintaining health, hygiene, and overall well-being, ensuring a clean, comfortable, and happy life for your pet. Here’s why:

Keeps the Coat Clean and Healthy

Brushing your pet daily or every few days helps remove dirt, loose hair, and dead skin cells. It also prevents mats and clumps, keeping the coat glossy and tangle-free. A well-maintained coat acts as a barrier against rashes and infections.

Prevents Flea Infestations and Parasites

Regular grooming sessions provide an opportunity to spot small signs of infestations. If your pet is infested, you may notice reddened skin, tiny red bites, hair loss, or a collection of brown flea dirt on the base of the tail, abdomen, neck, or ears.

Early Detection of Health Issues

When you brush, you can look for rashes, hot spots, lumps, and bald spots. If you notice any symptoms, a veterinarian can give advice on potential health concerns. Regular bathing and grooming help discover problems before they become uncomfortable.

Improves Hygiene and Odor Control

Bathing is essential for maintaining good hygiene and eliminating unpleasant smells. Using special shampoos, a professional groomer can remove excess dander and dirt, leaving the pet fresh and clean. Regular bathing also lowers allergens, helping allergic owners breathe easier.

Helps with Trimming Claws and Mobility

Overgrown nails affect a pet’s ability to walk and run, sometimes leading to ingrown claws. Trimming prevents misaligned pads, which can cause joint pain in dogs and cats. If cat’s nails get too long, they may curl and trap germs, increasing the risk of infections.

Strengthens the Bond Between Owner and Pet

Grooming sessions build trust and companionship, making your pet feel relaxed. Positive reinforcement during brushing and bathing improves mental health and behavior. A smelling good, looking neat pet enjoys more social opportunities with family.

Helps Prevent Shedding and Allergies

Certain breeds are heavy shedders, and regular brushing and bathing can loosen excess fur before it spreads on the floor. This reduces allergies and keeps the home clean. Conditioners can also lower the amount of shed hair, reducing the need to vacuum constantly.

How Often Should You Bathe Your Pet?

Keeping your pet clean is important, but bathing too often can cause dry skin. The best schedule depends on your pet’s breed, coat type, and lifestyle. Some breeds have oily coats that may need monthly baths, while short-haired dog or cat stay cleaner longer. If your furry friend loves rolling in mud or swimming in the ocean or a lake, more frequent baths may be needed.

A veterinarian can help determine the optimal time for your pet’s bathing routine, especially if they have a skin condition. Double-coated and water-repellant breeds may only need baths every few months to prevent dryness. Hairless breeds, like the Xoloitzcuintli, require weekly baths with a moisturizing shampoo to protect against infections. Brushing regularly helps remove dirt, debris, and bacteria between washes.

Grooming is more than just a full bath. A regular routine should include:

  • Trimming toenails to prevent discomfort
  • Brushing to remove snags and tangles
  • Using de-shedding tools for thicker coats
  • Cleaning ears and skin folds to avoid irritating buildup

Seasonality also affects bathing needs. In summer, dog odor worsens due to greasy coats, allergies, and parasites like fleas and ticks. In winter, domestic animals are less dirty, but their skin may become dry, requiring a moisturizing shampoo. A wet washcloth can help with spot cleaning instead of frequent baths.

Age and lifestyle play a role too. Puppies and kittens are more active and may need more baths, while senior dogs and cats tend to be inactive and may require intensive care, especially if dealing with incontinence. Grooming wipes are great for keeping them fresh without over-washing.

What Should be Included Pet Bathing and Grooming Session?

Grooming keeps your pet both clean and healthy, offering many benefits beyond just looking and smelling fresh. A good session includes brushing the coat to remove damaged and old hair, helping new growth. Professional handling helps detect bumps, lumps, or irritations, making sure any issue is caught early.

A proper bathing routine includes shampoos that are gentle, non-toxic, and safe for pets with sensitivity or allergy concerns. Professional groomers ensure thorough cleaning, especially if a pet gets muddy or even skunked. They also handle tough tasks like:

  • Trimming, shaving, and clipping unwanted hairs
  • Using special scissors and clippers suited for different breeds
  • Checking for ticks, fleas, and other pests

Pet parents who take their pets to a groomer regularly avoid heavy-duty hitting when dealing with tight knots or pets that have rolled in sticky substances like bubblegum. These tasks are best left to experts with special tools to deal with the situation safely. A well-done groom improves posture, movement, and overall health, making it easier for pets to run with ease while reducing the risk of injury.

7 Tips to Give Your Pet a Proper Bath

Many pets dread bath time, but the right tips can make the process easier. A gentle approach and good preparation help keep them comfortable while keeping their skin and fur clean.

  1. Don’t overfill the bathtub! Just a few inches of lukewarm water is ideal for small or medium pets. Too much water can feel overwhelming.
  2. Brush before the bath to remove dirt, prevent mats, and make detangling wet fur easier. This keeps the bath short and stress-free.
  3. Be prepared with supplies to avoid interruptions. Having shampoo, a towel, and other grooming tools ready reduces stress for both you and your pet.
  4. Provide sure footing by placing a non-slip rubber mat or a towel at the bottom of the tub. This prevents sliding on the slippery surface.
  5. Use only pet-safe shampoo! Human shampoo is too acidic and may contain fragrances that are unappealing or irritating, leading to dry skin or even an infection.
  6. Check dog-safe products online, at pet supply stores, or ask your veterinarian for recommendations. The right shampoo helps increase protection against skin issues.
  7. Consider a professional groomer if the bath is an unpleasant experience. Scheduling an appointment makes the process easier, especially for nervous pets.

Final Words

  • Regular pet bathing and grooming keeps your pet clean, healthy, and comfortable while reducing odors and skin problems.
  • A good routine includes bathing, brushing, trimming, and ear cleaning to prevent shedding, infections, and mobility issues.
  • Whether done at home or by a professional groomer, proper care ensures a happy, fresh-smelling pet that enjoys better well-being.

FAQs

What is bathing and grooming?

A bath keeps a pet’s coat clean, while grooming includes trimming, nails, and ears care. These tasks go a long way, offering traditional and extra services to pamper pets and ensure good hygiene.

What does pet grooming mean?

Pet grooming involves trimming, shaving, and clipping the coat when necessary, using scissors, clippers, and other special tools. Professional groomers have extensive knowledge about different dog breeds and know how to remove unwanted hair properly.

What is the purpose of grooming a pet?

Regular grooming and brushing keep a pet’s coat healthy and significantly improve comfort. It helps reinforce your bond, while reducing mats in the fur, which, if untreated, may cause abrasions, ulcers, pain, and discomfort.

What are the 7 steps of grooming a dog?

Start by brushing your dog regularly, as it is the key to keeping the coat clean and tangle-free. Give more frequent baths, keep an eye out for spring shedding, clip nails with the right equipment, and cut hair properly. Dogs use deodorant, too, so check paws for hygiene.

Posted on

Shocking Reason Why Your Cat’s Nails Are Splitting!

Why Are My Cat's Nails Splitting

Have you ever found tiny bits and pieces of your cat’s nails around the house, leaving you worried? As a concerned pet parent, you might be wondering why this is happening and whether it’s normal or a concern that needs vet attention.

Cats regularly shed the outer layers of their nails, and this process is completely normal. They typically remove the old claw-shaped layer by scratching on something, revealing a sharp, shiny new claw beneath.

However, splitting can also be due to potential causes like thin, misshapen nails, which may require a vet’s attention no matter whether it’s happening before or after a pet bathing session.

Why Are My Cat's Nails Splitting

Why Are My Cat’s Nails Splitting? Causes, Prevention & When to See a Vet

[su_note note_color=”#72E8E1″ radius=”18″]

Cats’ nails split naturally as they shed old layers, revealing new claws. However, overgrown nails, aging, improper trimming, poor diet, or health issues like infections and arthritis can worsen splitting.

Providing scratching posts, regular trims, and proper nutrition helps prevent problems. Severe splits causing pain or bleeding require veterinary care to avoid infections and discomfort.

[/su_note]

11 Potential Reasons Why Your Cat’s Nails are Splitting

Cats naturally experience the shedding of their nails as they grow. The old layer starts splitting, making room for a new one. On average, this happens every two to three months as the claw splits and falls off. If your cat is frequently scratching, it may speed up this process, helping the old layers come off without issues.

11 Potential Reasons Why Your Cat’s Nails are Splitting

1.          Old Layers

Cats’ nails go through a natural shedding process. Every two to three months, the old layer peels off, allowing a new claw to take place. This is actually normal and doesn’t always require vet attention unless you notice excessive splitting or discomfort.

2.          Overgrown Nails

When nails grow past their natural length, they can become overgrown, making it harder for your cat to use scratching posts or the litter box. This neglect can lead to split ends, discomfort, and an increased risk of cracks or breaks.

  • Overgrown nails may cause difficulty walking.
  • Avoiding scratching posts is a sign of pain.
  • Trimming is critical to prevent splitting.

3.          Aging

As your cat ages, its claws may become thicker and tougher, but also more prone to splitting. This is a common part of the aging process. Senior cats may need more frequent nail trims to prevent discomfort.

4.          Osteoarthritis

Degenerative joint diseases like osteoarthritis can reduce movement, making it harder for your cat to scratch. This lack of activity may cause nails to become overgrown or split. Bone spurs and cartilage degradation may lead to pain when scratching.

5.          Improper Nail Trimming

Using blunt clippers applies too much pressure, causing the nail to crack instead of making a clean trim. People using improper tools may unintentionally injure their cat’s paws, leading to bleeding or infection. Introducing a proper trimming routine early is critical.

6.          Chronic Biting And Grooming Issues

Some cats chew or bite their nails due to anxiety, stress, or grooming habits. If this happens excessively, it may signal an underlying condition like ringworm, fungal infections, or skin irritation. Watch for signs like red paws, dandruff, or intense scratching.

7.          Poor Health

Certain chronic health issues affect nail conditions. If your cat’s nails split frequently, it may be due to nutritional deficiencies affecting protein, muscle, tendons, or ligaments. A full coat or skin issues may also be linked to poor nutrition.

8.          Traumatic Injuries And Broken Nails

A cat may get its claws stuck in objects like carpets, scratching posts, or toys. Forcefully pulling free can lead to nail splitting, cracks, or even complete loss of the claw. Bad landings from high jumps may also result in traumatic injury.

9.          Nailbed Disorders

Onycholysis (nail separating from underlying structures) can occur due to bacterial, viral, or fungal infections. Tumors, though uncommon, can also cause nail splitting. If you notice abnormal growth, monitor your cat’s claws closely and seek a vet examination.

10.       Natural Cycle

Cats’ nails have an outer layer that sheds naturally. The first few layers fall off, revealing a sharp edge. If your cat is not scratching enough, the nails may split unevenly instead of peeling smoothly.

11.      Wrong Nail Clipper

Using the wrong clippers or not trimming regularly can lead to messy splitting. Keep a sharp, clean pair of clippers and trim the excess length without cutting too deep. Be cautious to avoid hitting the internal blood supply (quickly), as this can cause bleeding.

Tips for Healthy Nails

  • Trim regularly to prevent overgrown nails.
  • Provide scratching posts to aid in natural shedding.
  • Watch for frequent nail splits as a sign of health issues.
  • Examine paws daily for signs of injuries, infections, or splitting.
  • Seek vet advice if your cat’s nails seem brittle, painful, or frequently breaking.


Is Your Cat’s Nails Splitting a Serious Issue?

A cat with a split or broken nail can feel intense pain, making walking, jumping, and playing difficult. A cracked nail is not just uncomfortable, it can turn into a bigger problem if ignored. Your furry friend may struggle with mobility, favoring one paw and avoiding putting weight on it.

Why Your Cat’s Nails Splitting Can Be a Serious Issue?

Risk of Infection

A torn nail often leads to bleeding, creating an open wound that invites bacteria. Without proper medical attention, an infection can develop, affecting the surrounding tissue and causing further damage. If left untreated, it may require stronger treatments to clear up the issue.

Behavioral Changes

Pain can cause behavioral changes, making your cat irritable, agitated, or withdrawn from social interactions. In an attempt to groom, they might accidentally scratch themselves with the sharp, jagged edge of the injured nail, leading to further self-injury.

  • Frustration from limited mobility can make them less active.
  • The sharp nail can hurt other body parts.
  • If your cat is bothering their paw too much, a vet visit is essential.

If your cat is experiencing a split nail, quick veterinarian care is crucial to prevent complications. A vet may provide pain medication to relieve discomfort and ensure the nail is properly fixed. Seeking care early can help your furry friend recover quickly and restore their well-being.

What To Do If Your Cat’s Nails are Splitting?

Handle With Care When Treating Split Nails

If a cat’s nail splits, it may react unpredictably due to pain. Restrain it gently using a towel for comfort and safety. Having a family friend assist can help secure your feline to prevent scratching or biting.

Control Bleeding With Proper First-Aid

If the nail is bleeding, use a gauze pad and apply pressure to the affected paw for 5 to 10 minutes. If it continues, use a styptic pencil, silver nitrate stick, or cauterizing powder from pet stores or a pharmacy. Baking flour can act as a temporary clotting agent.

Remove Only the Loose Portion

Never attempt to remove an attached layer yourself. If a portion of the nail is uncomfortable, trim it carefully with clippers. The remaining base will regrow naturally. For severe cases, seek veterinary care to prevent infection.

Protect the Nail Bed From Infection

After trimming, clean the affected area with antibiotic ointment and apply a bandage to avoid contamination. In severe instances, a vet may prescribe oral or injectable medication to combat complications that could reach the bone.

Seek Veterinary Care for Persistent Issues

If your cat frequently experiences nail splitting, a checkup can rule out underlying health conditions. A veterinarian may perform advanced diagnostics to determine the cause and suggest the most effective treatment.

Make Nail Trimming Easier With Help

To make the nail-trimming session a success, enlist a friend or family member. Place your kitty on a slick surface, gently press the toe to extract the toenail, and trim the sharp tip carefully. Over time, your furry friend will get used to the routine.

Tips to Prevent Your Cat’s Nails from Splitting

Keeping your cat’s nails in good shape is important. If they are not trimmed properly, they may split, causing pain and discomfort. Here are some simple ways to prevent splitting and keep your furry friend happy.

Use Proper Nail-Trimming Techniques

  • Trim your cat’s nails regularly to maintain the right length and avoid injuries.
  • Use sharp clippers and follow a step-by-step routine to make the trimming process safe and pain-free.
  • A good technique ensures a comfortable experience, preventing overgrown or ingrown nails.

Feed a Complete, Well-Balanced Diet

  • A healthy diet strengthens nails and prevents them from breaking too easily.
  • Make sure your cat has access to proper meals that support nail structure.
  • Supervision of your cat’s eating habits helps maintain their nail care routine.

Maintain a Regular Grooming Schedule

Regular trimming is the ultimate way to minimize nail splitting. Use appropriate clippers and avoid cutting too far down to prevent painful accidents. If you are unsure, a professional groomer can assist.

  • Incorporate nail maintenance into your house duties to make it an easy routine.
  • Seek help from grooming pros or an expert if trimming becomes a challenge.
  • Some pet owners prefer house calls for convenience when handling nail care.

Choose the Right Scratching Posts

A cat needs scratching posts to keep its nails healthy. Without them, furniture and drapery may suffer, and the claws can become weak. The thought of declawing may cross some owners’ minds, but it’s a drastic decision and is not recommended by vets.

  • Select cat scratching posts that fit your space, whether small footprint or floor-to-ceiling.
  • A massive shopping spree isn’t needed as a simple solution gets the job done.
  • Placing scratching posts near the litter box, lounging spots, or hiding areas encourages use.
  • Cardboard replacements are a budget-friendly option for small apartments or big homes.

Final Takeaway

Here’s a summary of what you should be taking care of if your cat’s nails are splitting:

  • Cats’ nails split due to a natural shedding process, but excessive splitting can signal overgrown nails, aging, poor grooming, or health issues.
  • Lack of scratching outlets, improper trimming, and nutritional deficiencies can weaken nails.
  • Prevent splitting by trimming regularly, providing scratching posts, and ensuring a well-balanced diet for strong, healthy nails.

FAQs

How do I stop my cat’s nails from splitting?

Using a trimmer with a sharp blade ensures precision while making clean clips on the sharp tip of the claws, leaving a smooth, round end that prevents injuries. Normal people should trim instead of considering declawing, as it harms the cat.

Will a cat’s split nail heal on its own?

A common reason for a cat’s nails splitting is natural wear from climbing and tumbling. If a split occurs, the old nail may drop off, allowing a new one to grow back. Cats often lick the area, which helps it heal, but a deep break might need attention. If it’s minor, it should heal on its own.

Should I take my cat to the vet for a split nail?

If there’s no bleeding or infection, your cat is fine, so there’s no need for an emergency trip. Just ask a vet to trim the nail next time you visit the clinic, as a veterinarian knows the best way to help.

Why does my cat have split nails?

Nails splitting can look alarming, but it’s a normal part of cats’ shedding process and usually no cause for worry. However, if the splits go deeper, leading to bleeding, discomfort, or signs of pain, and your cat seems aggressive, you should visit a vet.